Workbench: The Basics
Capture your progress
planeus isn’t just a scheduler. It’s a modular solution that brings planning, execution, and data management together on a synergetic platform.
Unlike traditional systems that separate planning from execution:
- You can choose to run planeus solely as a planning system and integrate it to your existing shop floor systems (for example, an MES), or;
- You can have an in-system option to integrates planning & ex into a single workflow.
That’s where the Workbench comes in.
What is Workbench?
Workbench is a lightweight, in-system execution module to capture real-time operation data fed directly by your shop floor employees.
It makes workers to enter feedback and time data easily, helping keep your plan and reality perfectly in sync.
Workbench makes planeus a new, different experience — by ensuring your production data is always accurate andconnected to your plan.
Two ways to capture feedback
Workbench offers two types of interfaces:
- Workbench Classic: The standard interface for entering times and feedback manually.
- Workbench Terminal: The device-oriented interface linked to screens or portable devices for precise tracking.
What’s the difference?
- In Workbench Classic, times are recorded as absolute values.
- The Workbench Terminal includes a Start/Stop feature for automated time calculation and only Work Steps (not Processes) can be reported.
Both systems share the same data structure, which means you can use them side by side without conflict.
Only Resources marked as “Allow Feedback” are visible in the Workbench. More about Resources
Completed Work Steps older than 3 weeks will not be shown in Workbench.
Basic Workbench features
Here’s what you can do in the Workbench to record what’s happening on the shop floor:
Recording Disruptions & Causses of Disruptions
Sometimes things don’t go as planned.
- In the Workbench, you can record disruptions (like machine issues or delays).
- You’ll choose a Causes of Disruption from a list of causes, which you’ll find under: Configuration → Disruptions.
Scanning in the Workbench
If your shop floor uses barcodes, you can integrate it into Workbench using this feature.
Once an operator scan a barcode, planeus will...
- Instantly find the Work Step they need to work on, and
- Pull up the right screen for the operator to enter data quickly.
This saves time, reduces errors, and helps keep production moving smoothly.
How it works?
- Click the Scan icon at the bottom right in the Workbench.
- And a window will open for you to enter the barcode.
You can:
- Scan the barcode directly using a scanner.
- Enter the barcode number manually.
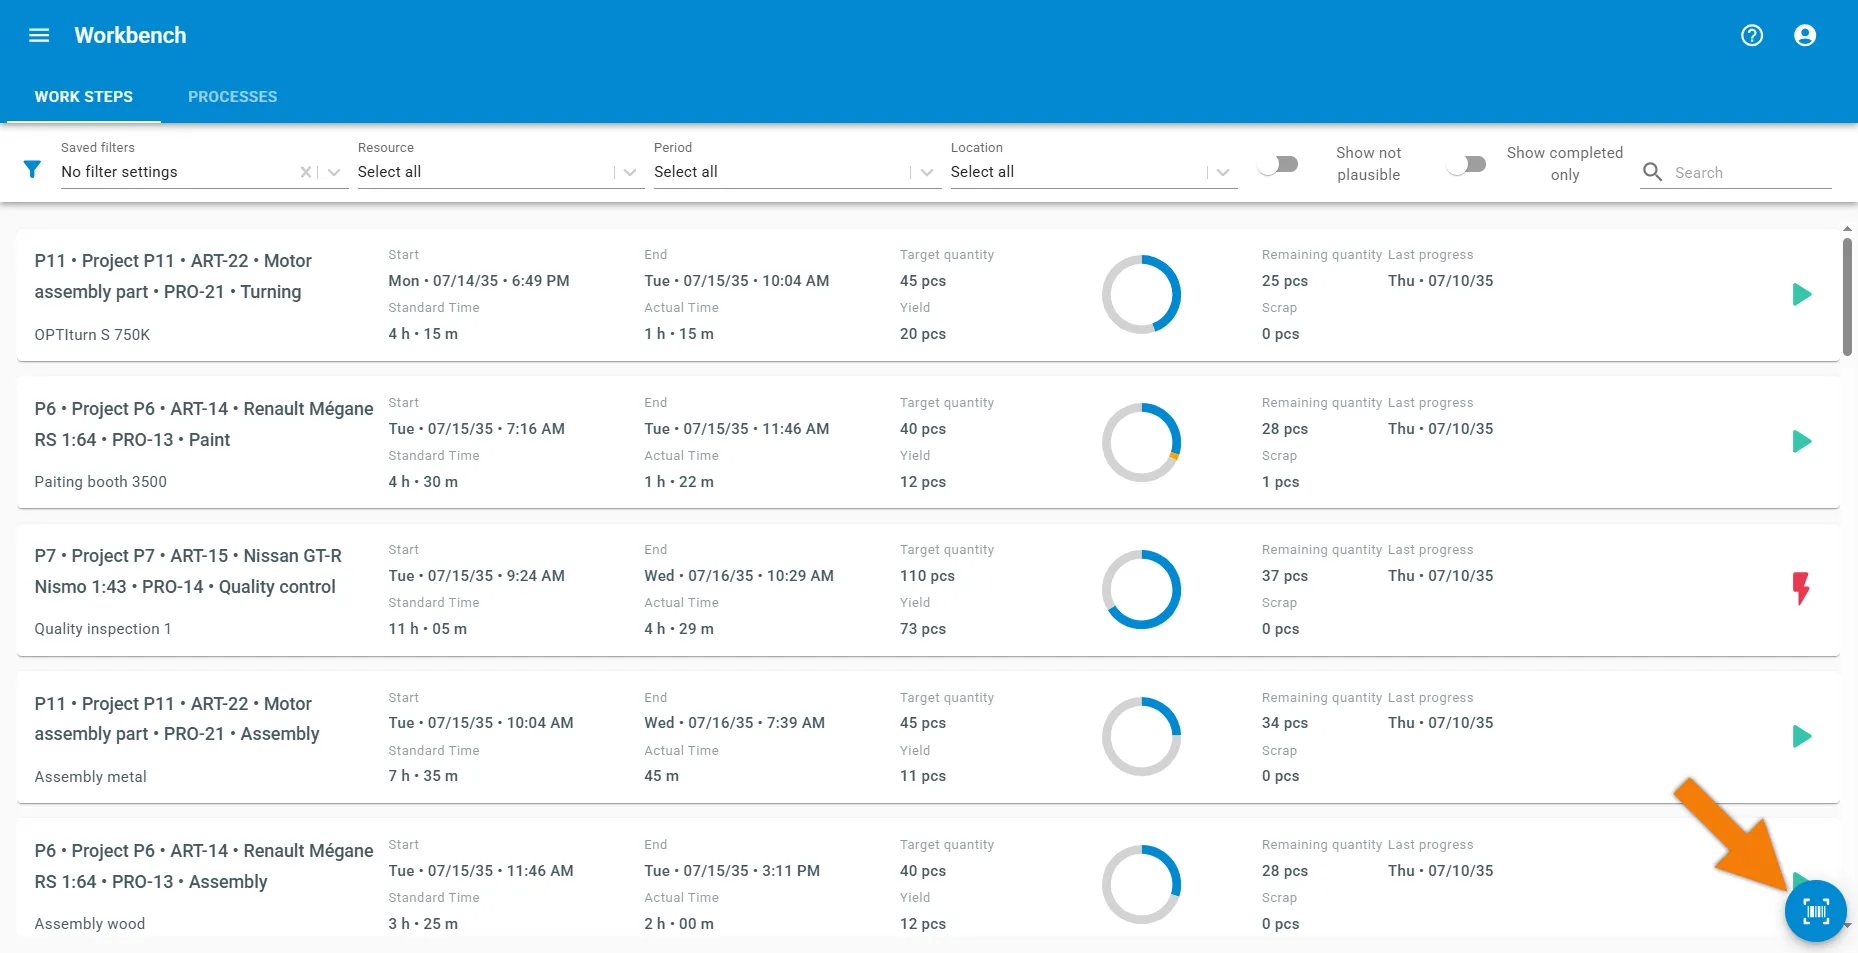
If you want to enter the barcode number manually, you can
- Type it using your keyboard, or
- Use the on-screen number pad by clicking the keyboard icon in the bottom right corner.

Once you enter or scan the barcode:
- The related Work Step will open automatically, so you can enter your feedback or data right away.
Generating a Routing Slip (job ticket)
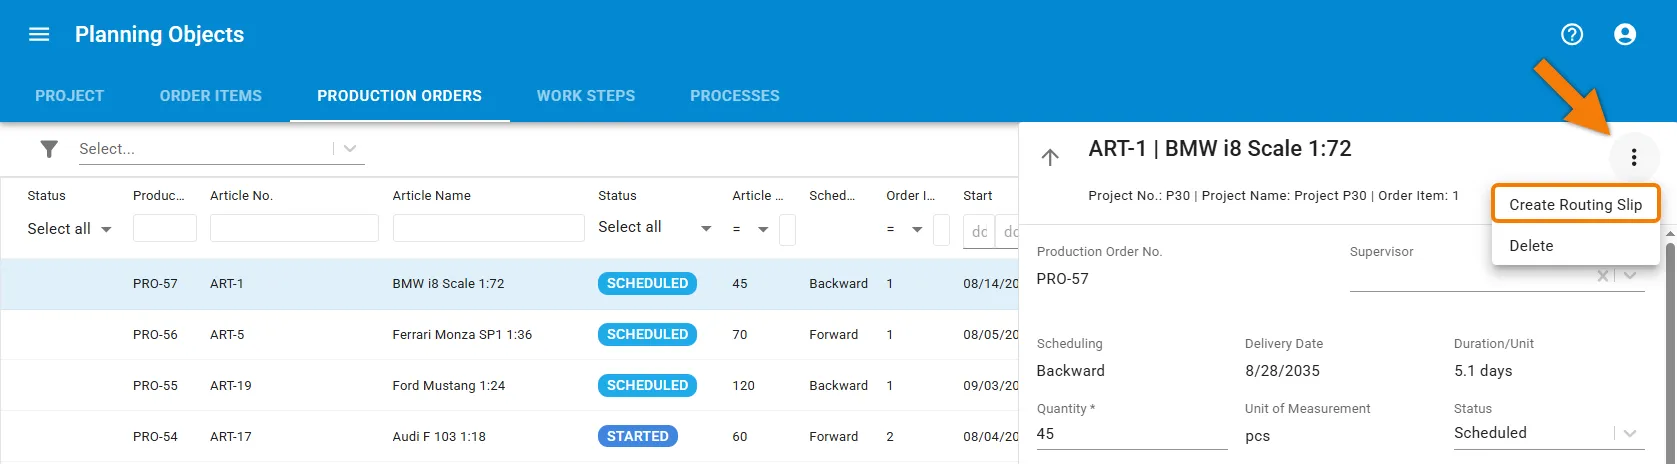
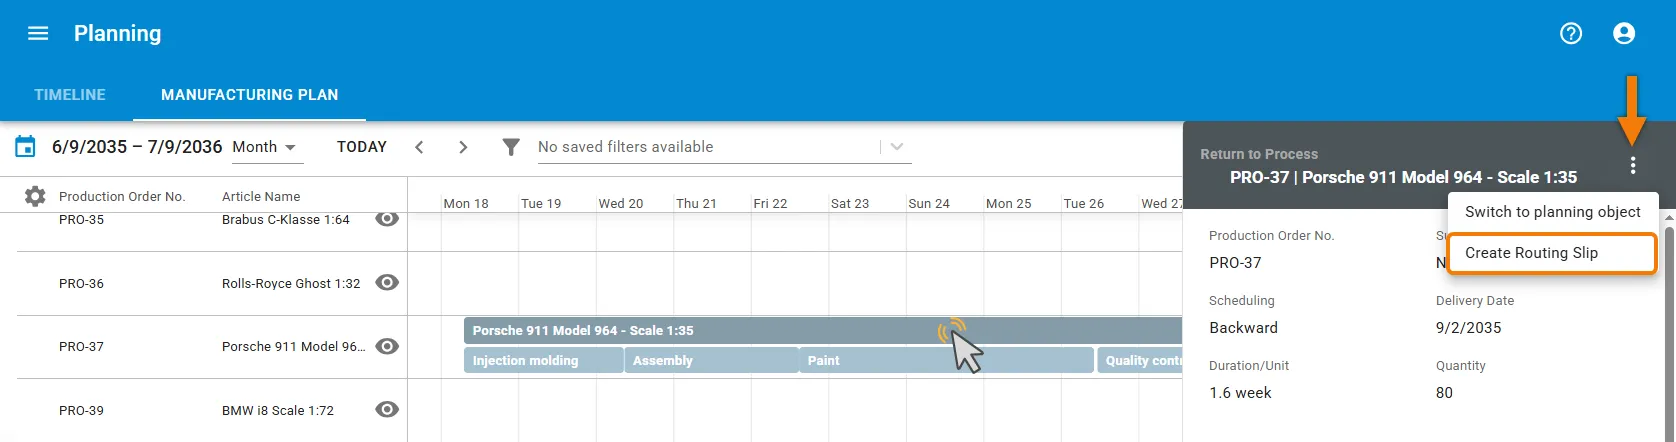
- For each Production Order, a Routing Slip that includes a barcode can be generated.
- You can find it under Planning Objects → Production Orders
- You can also find it by clicking on the Production Process in the Gantt chart.
Uploading photos & documents
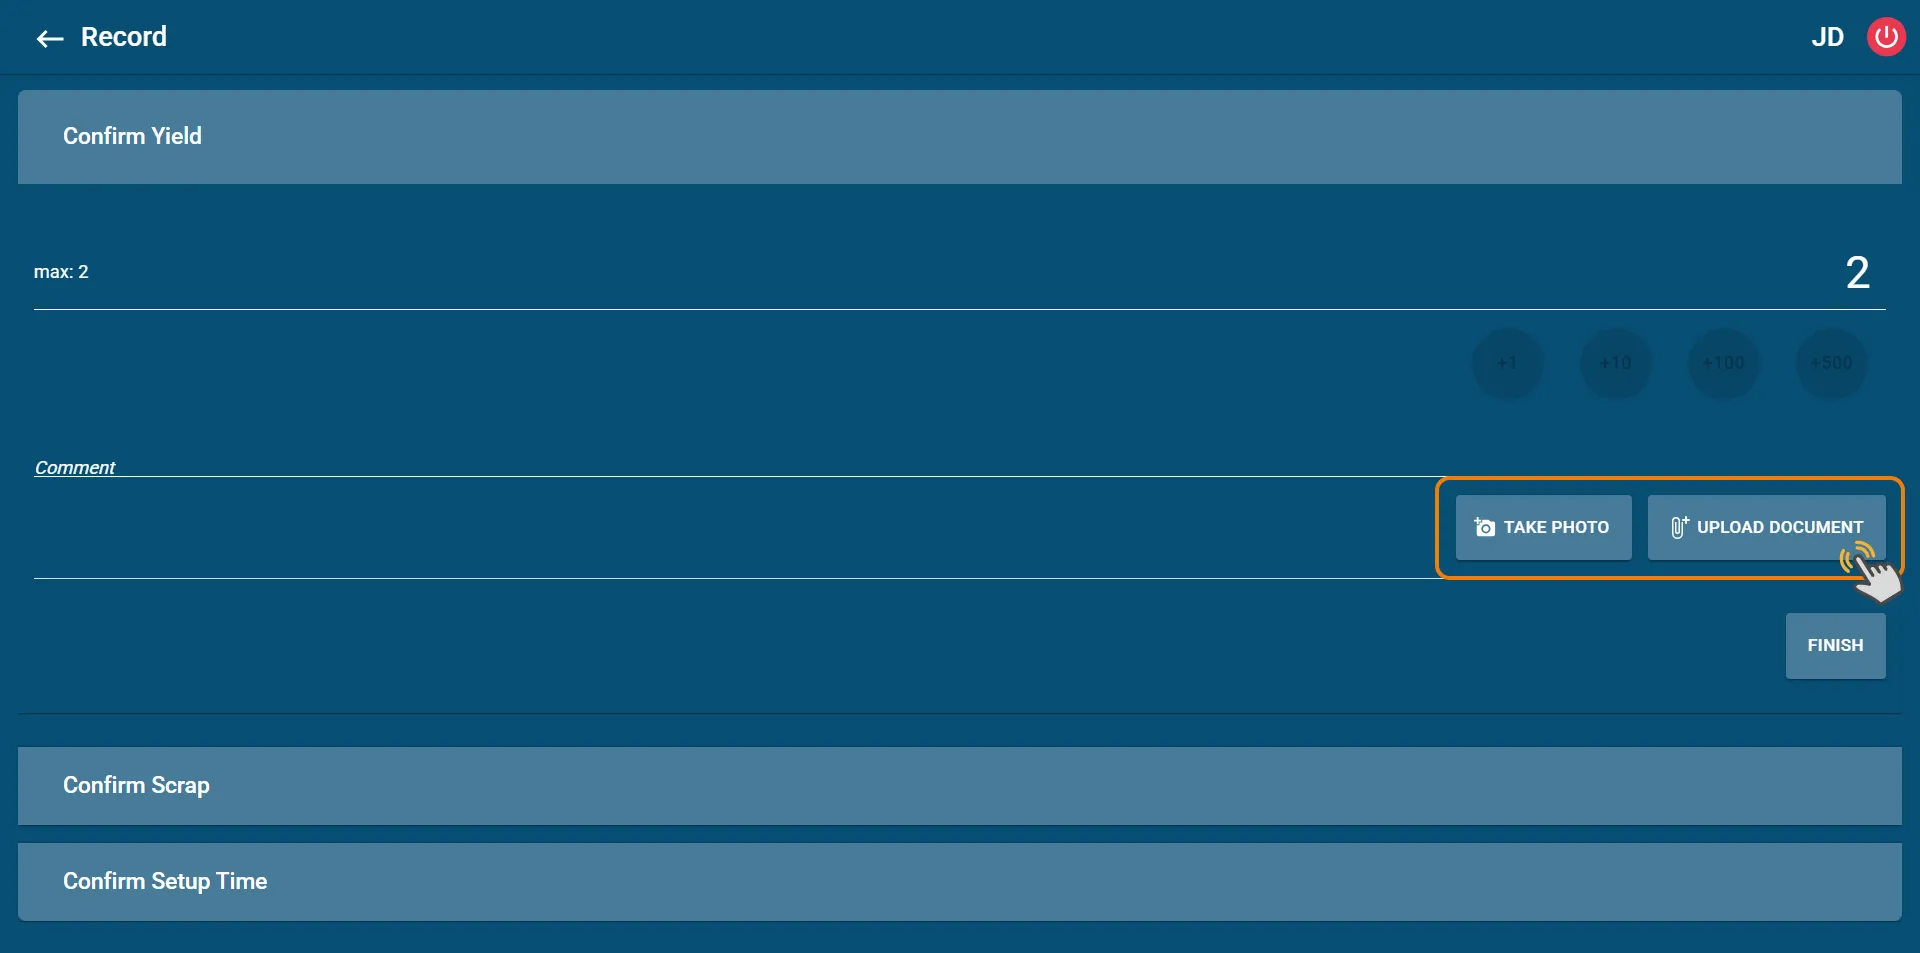
Sometimes you need to add more than just numbers. And in Workbench, you can take a photo or upload a file directly when providing feedback or updating progress.
Where to find the upload button?
- In Workbench Classic:
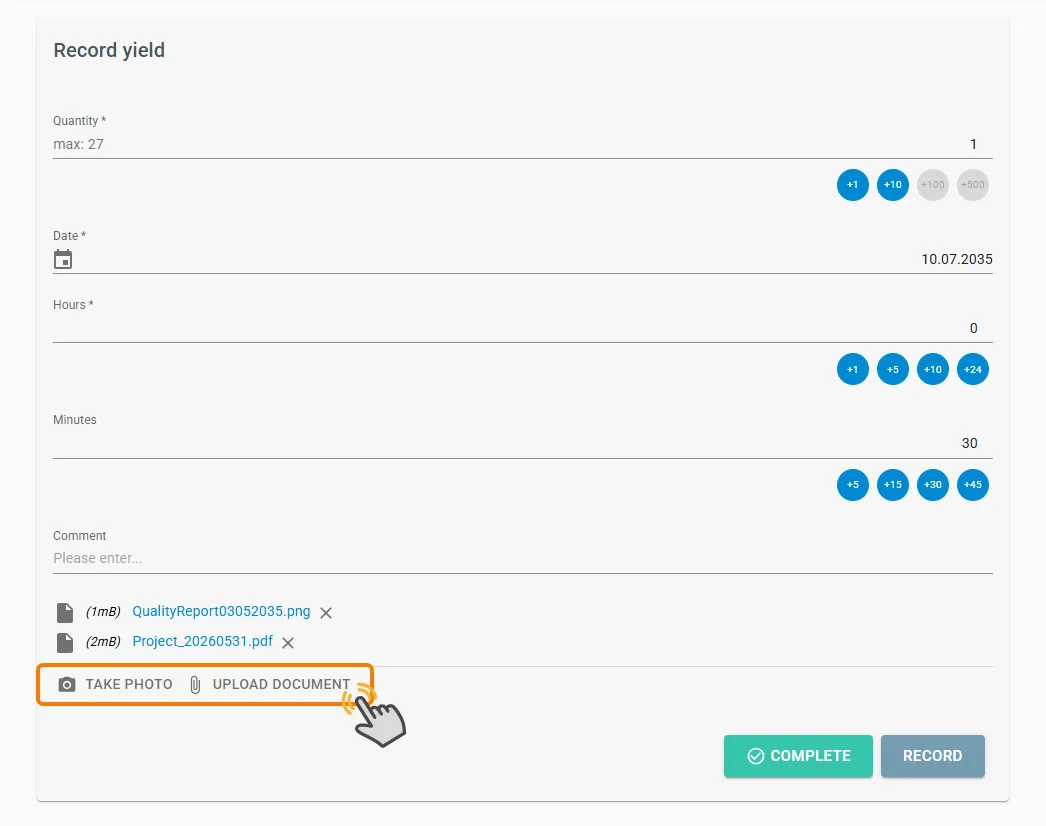
- In Workbench Terminal:
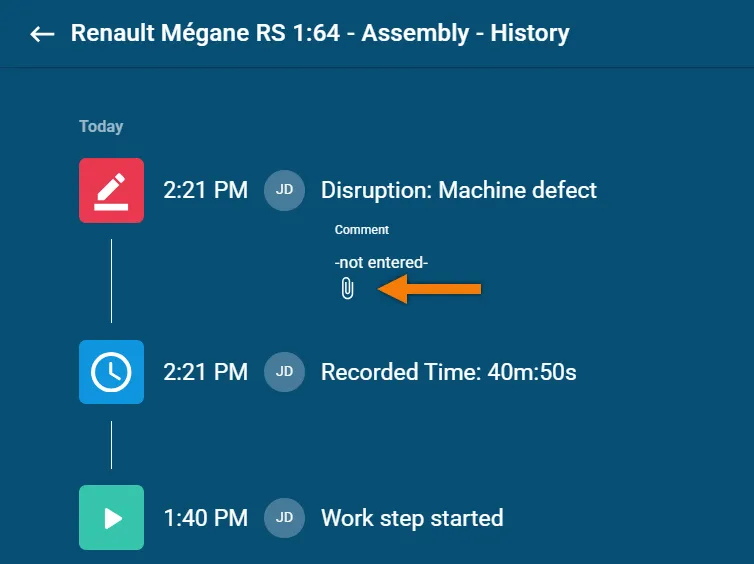
You can see the uploaded photos and document in History.
You can also open or download these files later in Reporting, like Feedback on Work Steps or Feedback on Processes.
Custom fields
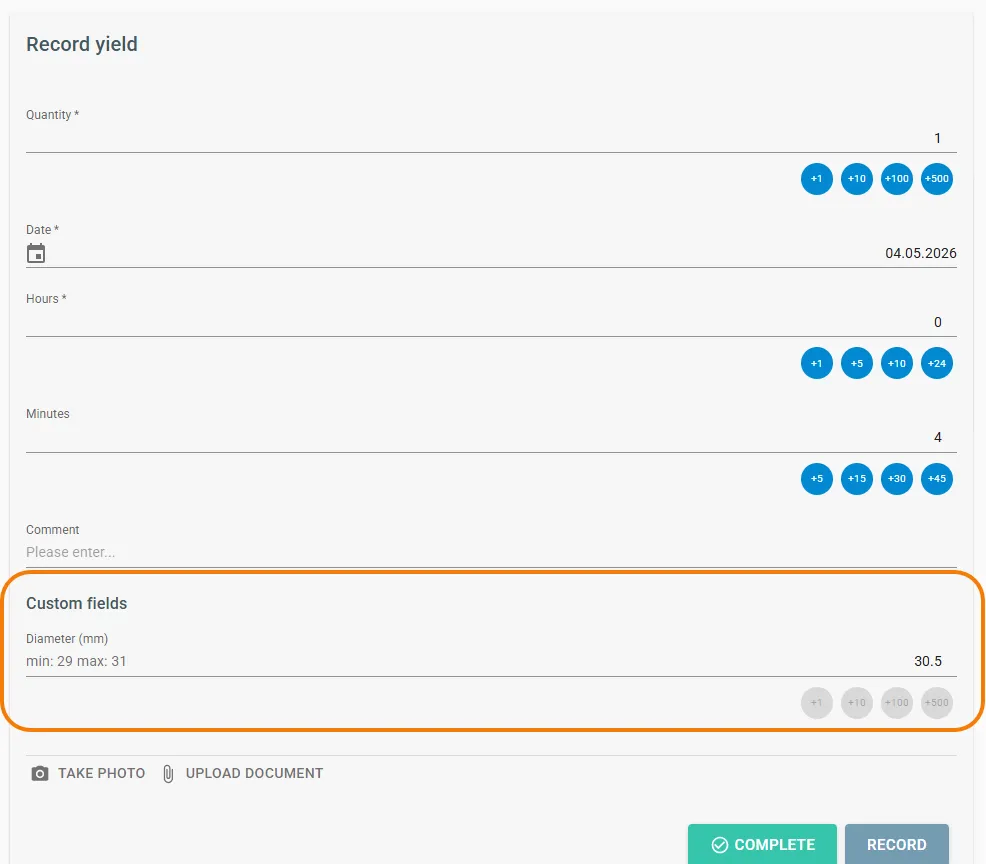
Custom fields let you add extra input fields in the Workbench (Classic and Terminal). This makes it easy to capture additional production-specific information as part of feedback.
This feature requires a license. Access also depends on user roles. To analyze custom field data in reports, you also need reporting licenses.
Basics
In Workbench Classic, you can find custom fields under the Custom fields tab in the header of the open Work Step.
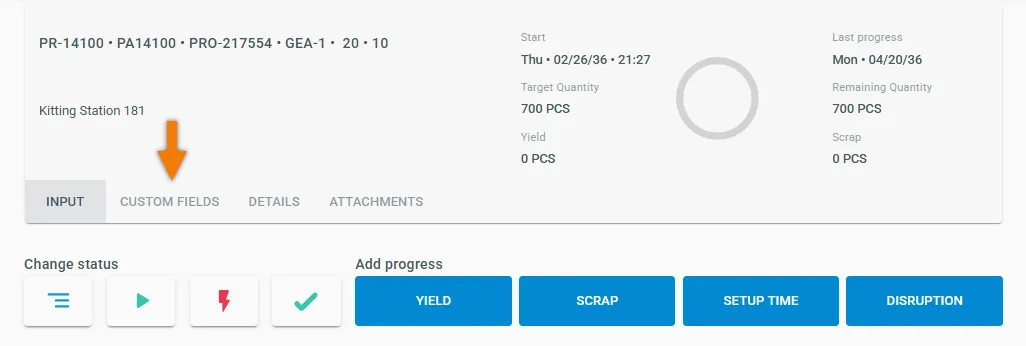
In Workbench Terminal, you first open the details of the Work Step. If custom fields are available, planeus shows an orange dot on the icon.

How to configure custom fields
You define custom fields under: Configuration → Custom fields
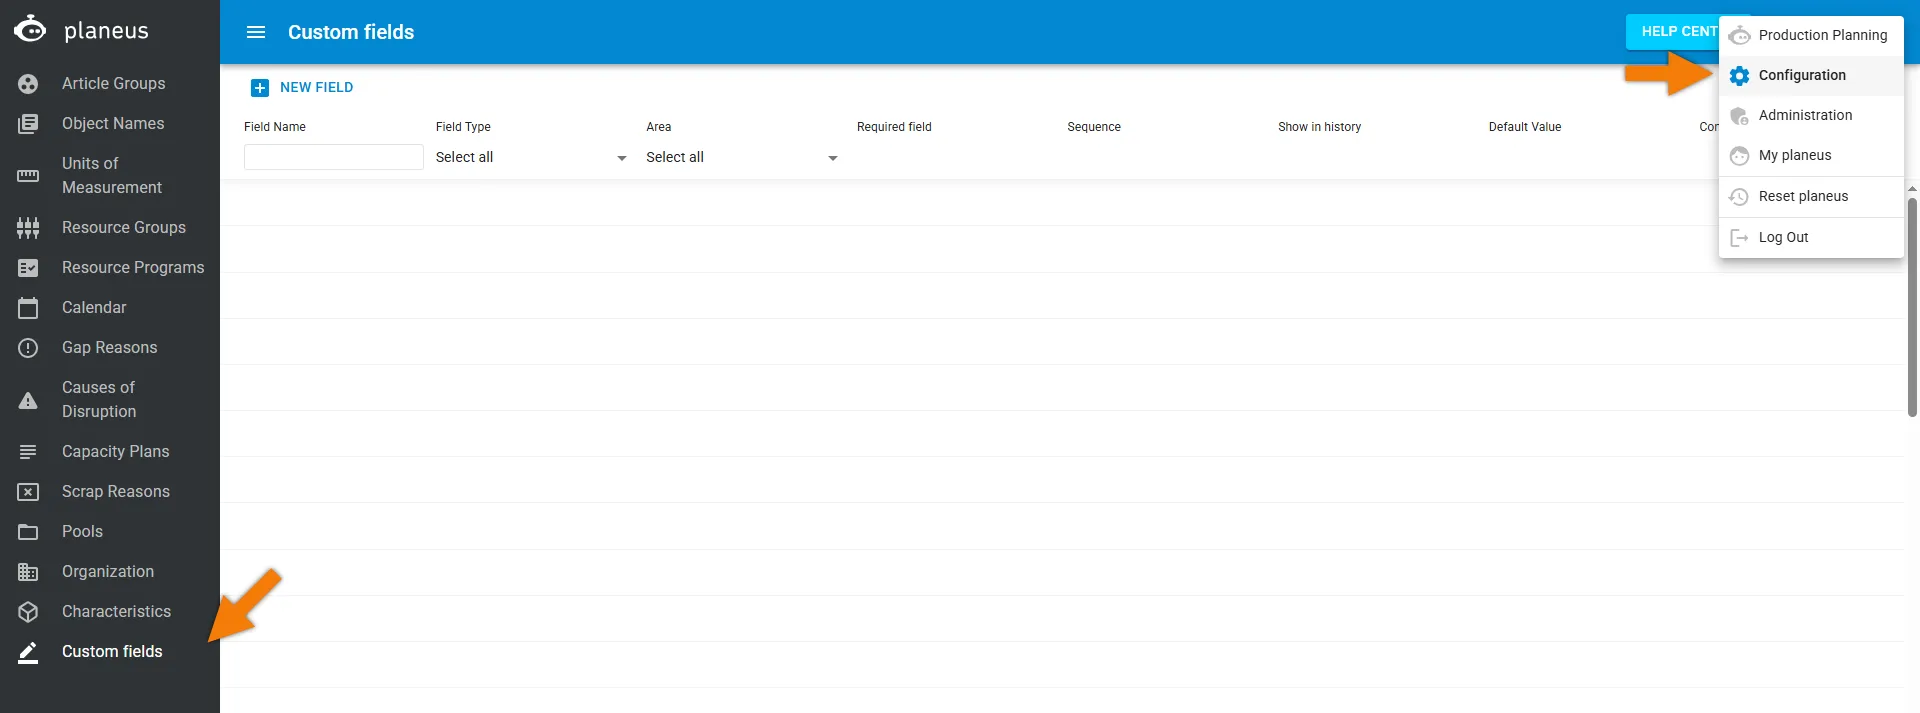
There you decide:
- which fields you want to use
- where they should appear
- when they should appear
- whether users must fill them in
Field definition
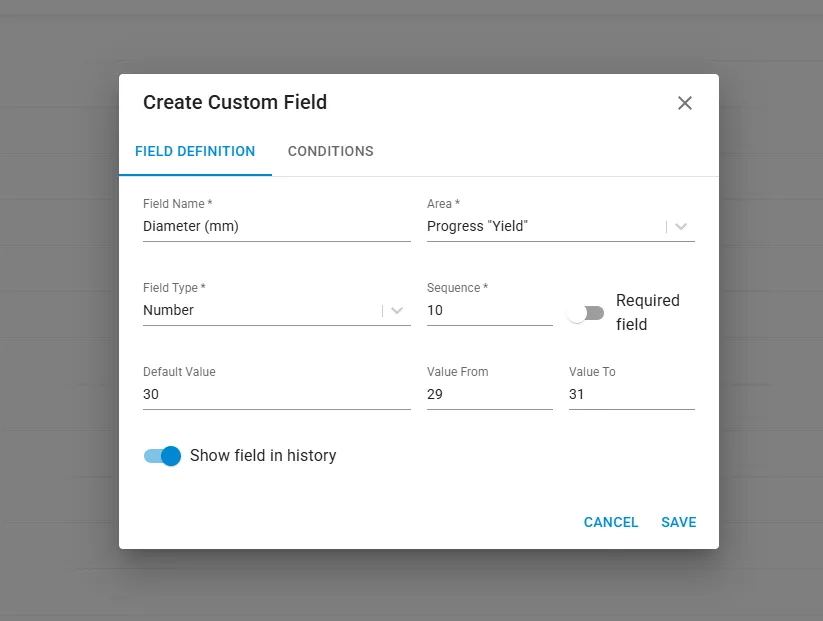
In the field definition, you set the field name. This is a free-text label that describes the purpose of the field.
Under Area, you choose where planeus should show the field in the Workbench.
Available areas:
- Progress "Scrap"
- Progress "Yield"
- Progress "Setup time"
- Progress "Disruption "
- Workbench Work step
Field types
planeus supports these field types:
- selection list
- date
- text
- number
Default value
The default value pre-fills the field in the Workbench.
Order
The order defines where the field appears when you use multiple custom fields.
Required field
The required field toggle makes the field mandatory in the Workbench.
Users cannot complete the Work step until they fill in that field.
Show field in history
The show field in history toggle makes the field visible in the Work step history.
Control when fields appear
You can control field visibility with conditions.
Available options:
- show for all Work steps
- show only for the first Work step of a production order
- show only for the last Work step of a production order
- show only for selected resource groups or resources
If you enable selected resources or resource groups, planeus adds two dropdown lists. There you can choose the relevant resources or resource groups. You can select more than one.
Permissions for custom fields
Custom fields follow the standard planeus permissions model.
To fill in custom fields, a user needs the permission:
Workbench Work steps write
After the user saves the values, they cannot change them without additional rights.
To correct values later, a user needs:
Feedback / correct status ‘Completed’
If a user does not have the required permission, existing values stay visible but cannot be edited.
If a user only has read access and no entries exist yet, planeus hides the entire Custom fields section in the Workbench.
Reporting
planeus shows custom field data in these reports:
- Work step feedback
- Target/actual comparison Work steps
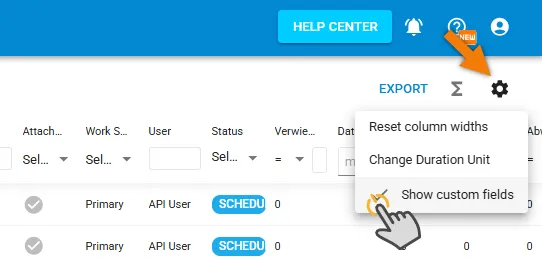
To see these fields in reporting, enable Show custom fields.
You can do this through the gear icon in the upper-right corner of the reporting view.
Settings for both Workbenches
You can adjust how the Workbench behaves under Administration → Settings → Workbench
Auto-Complete Predecessors
If this setting is enabled, when you complete a Work Step, it will automatically complete any earlier steps.
Plausibility Checks
This feature helps keep your data accurate.
Plausibility Checks for Work Step
For Work Steps:
- It checks that the quantity you report in a Work Step is less than or equal to what was recorded in the previous step.
While entering data, you’ll also see the quantity recorded in the previous step.
Plausibility check for Overlapping Work Steps
If Work Steps overlap, the Work Steps and its following Work Steps can be started — regardless of the quantities already reported.
Quantity reporting: Even with overlapping Work Steps, the quantity is still taken only from the direct predecessor. This means you can only report the quantity that has already been reported for the direct predecessor.
Plausibility Checks for Process
Plausibility checks also work for Processes, even though they don’t have quantities.
- In this case, the previous Process needs to be finished before you can report the next one.
Plausibility Checks for Assembly
For Assemblies:
- You must finish the Production Order for a sub-assembly before you can report feedback on Work Steps in the main assembly.
Partial quantity checks only apply within the same Production Order.
Missing Predecessor Feedback
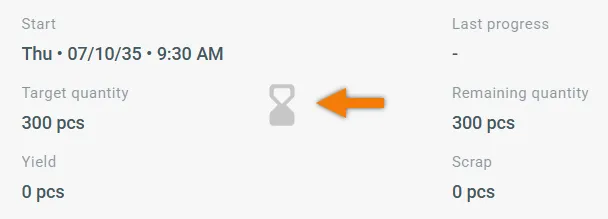
- If an earlier Work Step has no feedback yet, you’ll see an hourglass icon.
This icon will only appear when Plausibility Check for Work Step is enabled under Settings > Workbench
"Show not plausible" switch
You can use the “Show not plausible” switch to hide or show any Work Steps that are not ready to start yet.
This switch will only appear when Plausibility Check for Work Step is enabled under Settings > Workbench
Mandatory Fields in the Workbench
You can make certain fields mandatory for users:
- Set "Yield" as Mandatory Field
- Allows feedback on the quantity Yield and Scrap.
- Set "Duration" as Mandatory Field
- Allow feedback on the time consumed by Yield, Scrap, and Disruptions.
Anonymous Feedback
- planeus allows anonymous feedback, where no user name is recorded.
- Anonymous entries will have a special icon in the Workbench.
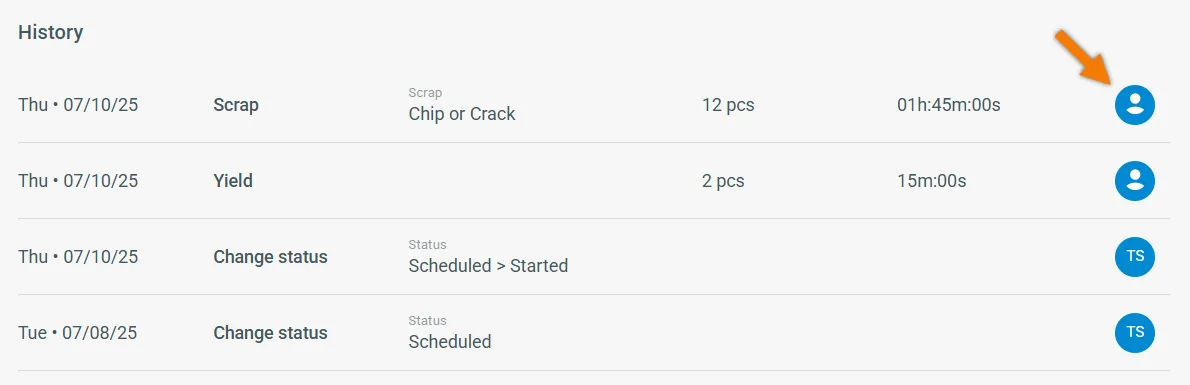
This switch will only appear when Add Feedback anonymously is enabled under Settings > Workbench
Customizable Texts & Headings
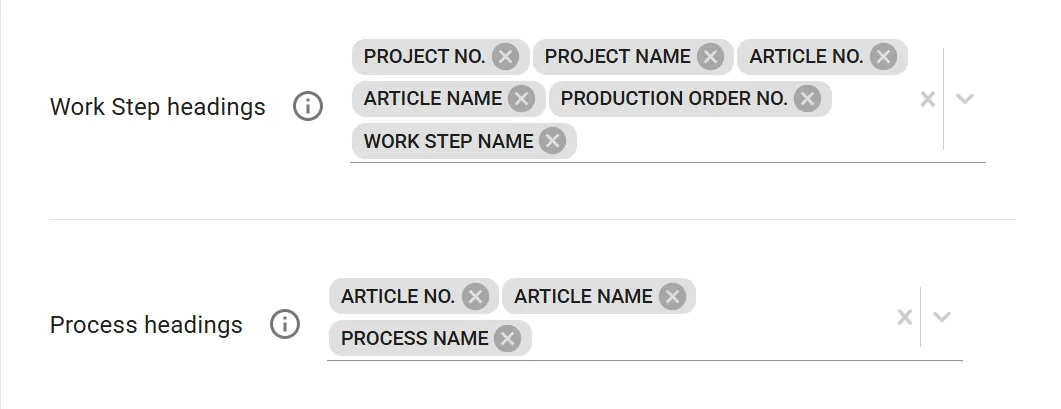
You can tailor the Workbench to fit your team’s language and preferences:
- You can customize your headings and text in both list and detail views.
Quantity Check on Completion
This setting makes sure that every step in production follows the actual yield from the Work Step before.
- The remaining quantity always matches what was finished in the last Work Step.
- The first Work Step starts with the target quantity provided by the prodcution order.
- Yield and Scrap automatically reduce the remaining quantity.

When would you need “Quantity Check on Completion”?
This setting is helpful when:
- Every step depends on the last one Example: In assembly, you can’t have more finished products in Step 2 than what Step 1 actually produced.
- You need to avoid over-reporting Without the check, someone could accidentally enter a higher yield than what was really available.
- You want a clear chain of quantities Each step passes its actual yield to the next one, so the numbers always add up.
- Scrap must be tracked correctly If something is scrapped in one step, it won’t magically reappear in later steps.
Example: In the Workbench Terminal
- A step can only start when the previous step is completed.
- A step can only be completed if:
- Yield + Scrap = Yield from the previous step
- The target quantity of the first step is based on the full order quantity.
- If the previous step is not completed. the “Complete Operation” button stays grayed out.
- The system fills in the remaining quantity for you.
- If you enter more than the target quantity, you’ll see an error: “Feedback quantity > Target quantity.”
The Workbench helps you quickly collect real-time progress from your shop floor. It’s flexible, customizable, and designed to fit the way you work!