Creating & Editing
Creating Projects in planeus
Here’s how you create a new Project and manage your Order Items in planeus step by step.
How to create a new Project?
- To create an Order Item, you first need to create a New Project:
- Go to Planning Objects > Projects > New Project.
- Enter a Project Name.
- Select a Customer.
- Then, move to the Order Item section and fill in these details:
- Article
- Desired Delivery Date
- Scheduling (Forward or Backward)
- Start Date
- Quantity
- When everything is done, click Create Project.
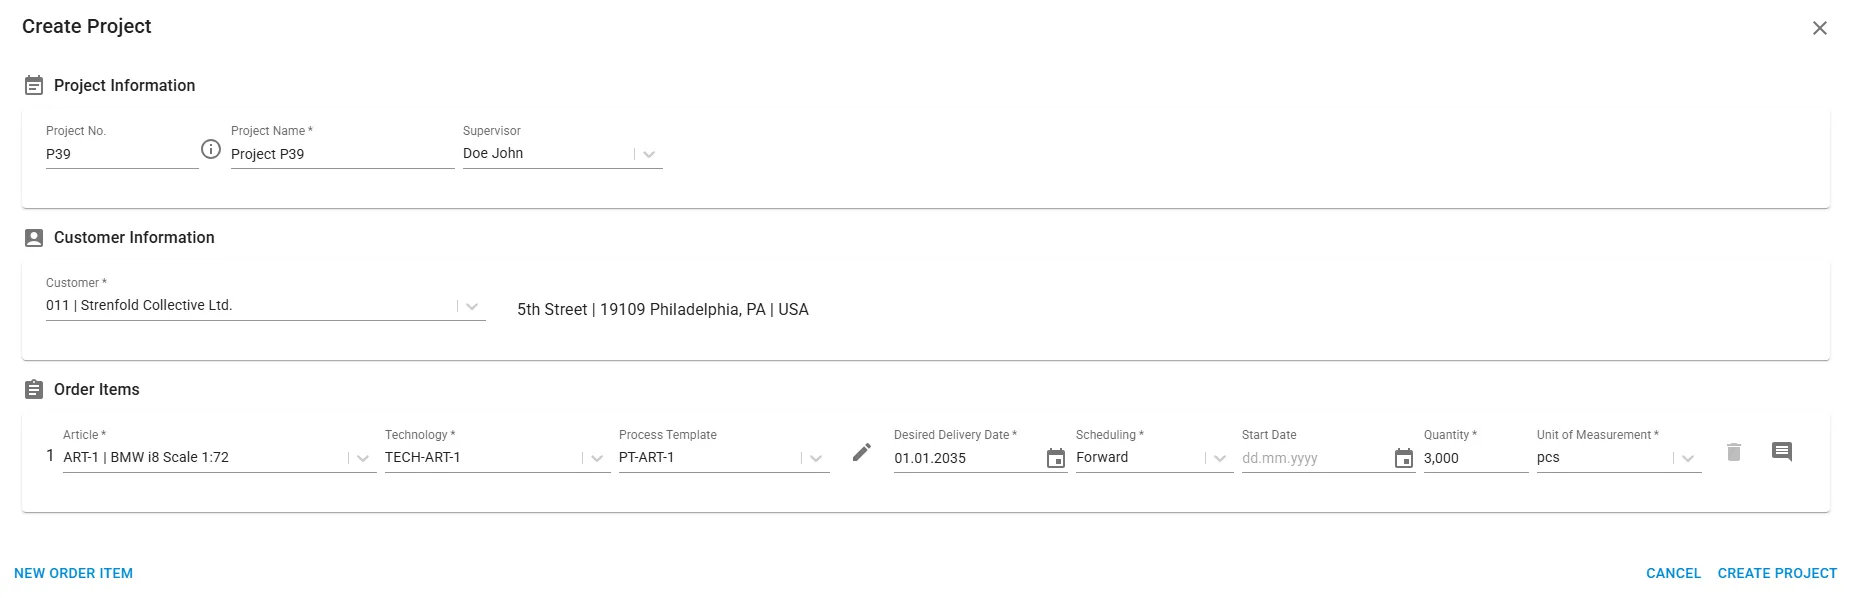
Article: When you select an Article, planeus will automatically fill in the default Technology and Process Template.
Start Date: This is only available when Forward Scheduling is selected.
What happens after you create a Project?
planeus runs its planning algorithm to check:
- If the Order Item can be scheduled.
- When it can be completed.
You’ll then see automatically generated Summary, showing:
- Whether your desired delivery dates can be met.
- Any conflicts that might prevent scheduling.
Understanding the Summary
- Click on any Order Item line in the Summary to view details about critical objects causing conflicts.
- This helps you decide whether you want to:
- Plan the order without compromise.
- Adjust dates or quantities to resolve issues.
- If your completion date is shown in red, it means you cannot meet your desired delivery date.
You can set the default scheduling direction (Forward or Backward) under Settings > Planning.
What If an Order Item can’t be scheduled?
If planeus cannot plan an Order Item, the Order Item gets the status “Not Scheduled”. It will not be shown on the Gantt charts. But you can find it again under the Order Item tab in Planning Objects.
Here, you can:
- Edit the delivery date or quantity in the Order Item’s detail panel.
- Try schedule it again.

You cannot reschedule in the Project tab. To reschedule a Project, go to the Order Item tab and edit the Order Items in that Project by batch-editing or individually.
Batch-editing multiple Order Items
How to batch-edit multiple Order Items?
- Select the checkboxes next to the Order Items you want to edit.
- The top of the screen shows how many you’ve selected.
- Click the Select icon to open a menu of actions you can apply to all selected items.
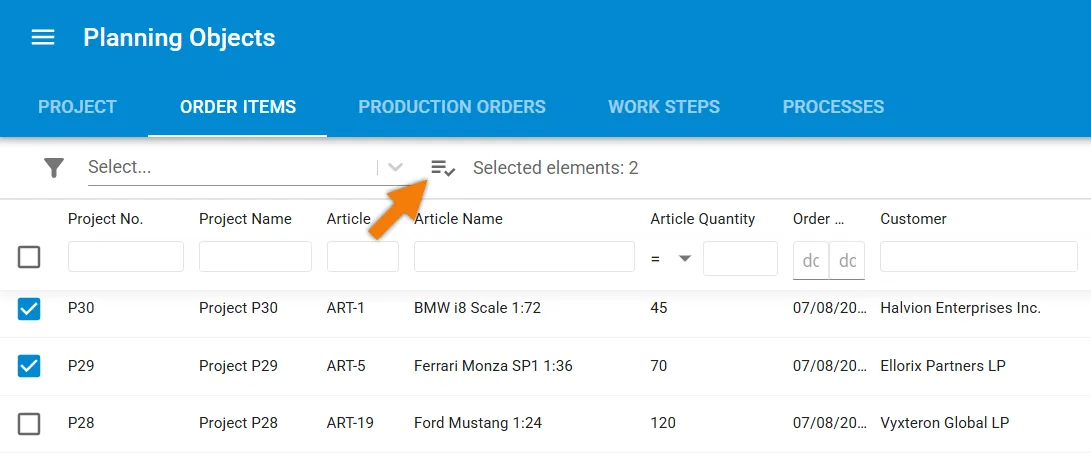
Actions you can do with batch-editing
- Plan conflictless
- Plan anyway
- Unschedule Order Items
- Delete Order Items
- Edit comments
- Edit Order Items (e.g., Change delivery dates, start dates for multiple Order Items)
- Edit Technologies / Process Templates
- Delete Order Items
For each Order Item you select, planeus only does actions that are possible. For example, if you picked the following Order Items and performed "Unschedule":
- 1 Scheduled Order Item
- 1 Not Scheduled Order Item
planeus will only unschedule the 1st Order Item that was previously scheduled .
Fields you can edit with batch-editing
- The available fields depend on:
- The current status of the Order Items.
- The properties of each Order Item.
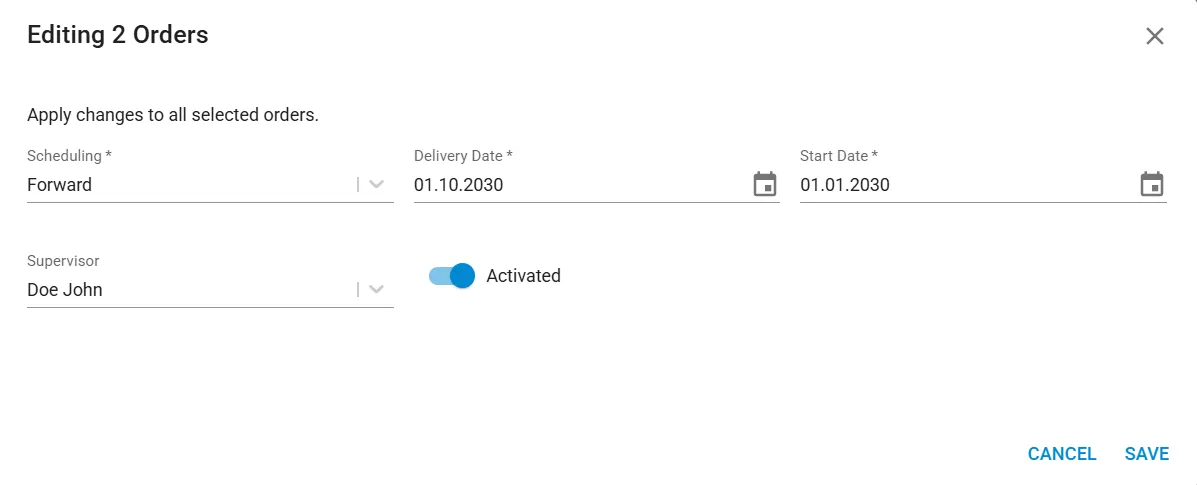
For manually created Order Items, you can always edit the delivery date.
For imported Order Items, you can only change the delivery date if the importing option Reschedule by changing delivery dates is disabled.
Batch-Editing Technologies / Process Templates
You can edit Technologies or Process Templates in batches for Order Items that are not yet scheduled and featuring the same Article. So you don’t have to delete and recreate Order Items just to change or switch routings.
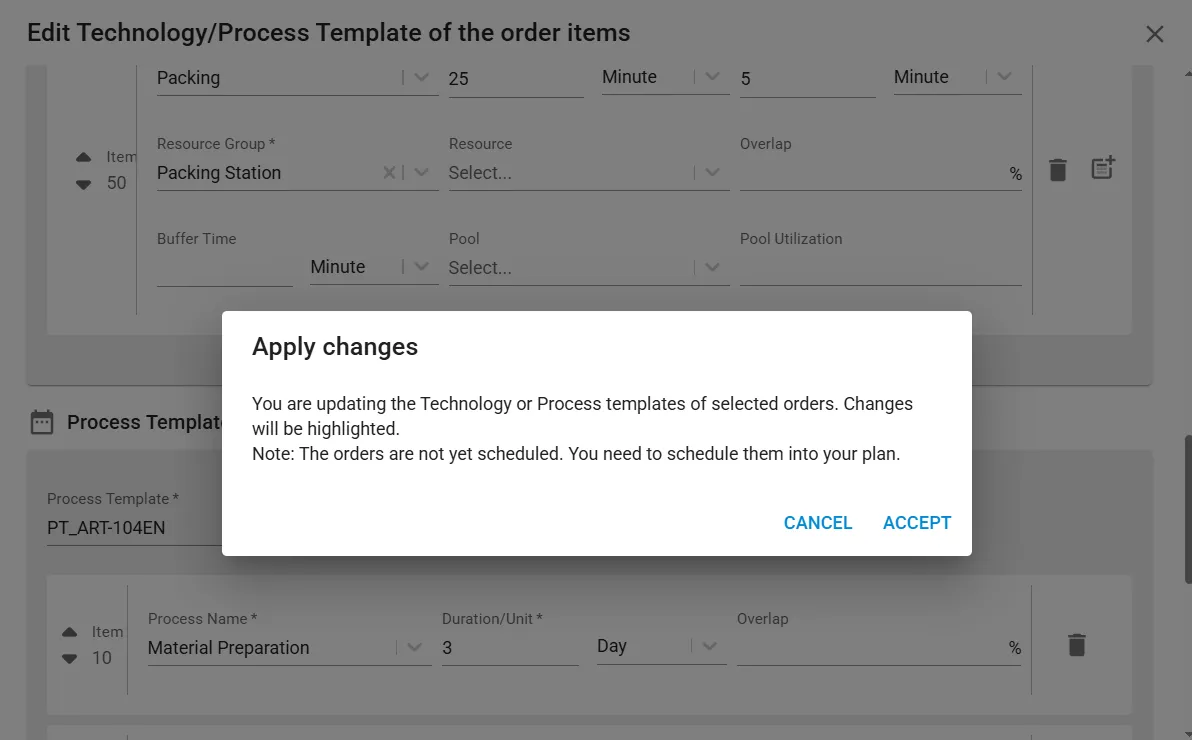
When you make changes in this:
- Your changes will only apply when you plan them.
To apply your changes:
- Click Save.
- Keep the Order Items selected.
- Open the drop-down menu and choose either:
- Plan Anyway
- Plan Conflictless
Changes affect only the Technologies and Process Templates of your Planning Objects. They will not change their Master Data.
Showing Yield Quantity and Work Step Progress in the Order Item
The detail panel of the Order Item gives you a quick overview of the current Work Step progress.
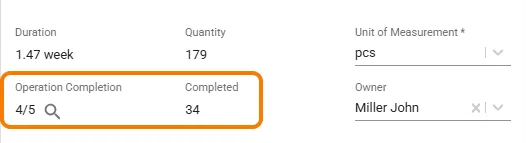
Click the magnifying glass icon to open a detailed view of the yield quantities for each individual Work Step.
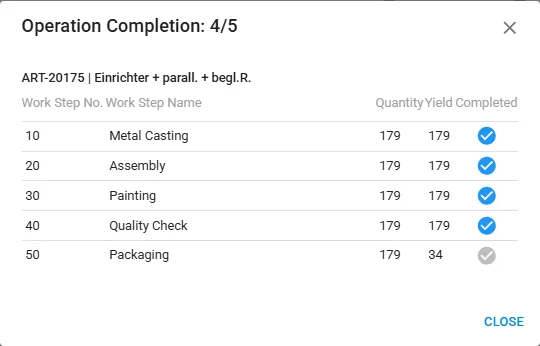
If an Order Item contains a product with sub-assemblies, the yield quantities of the related sub-assemblies are shown as well.
Assigning Supervisor in Planning Objects
- A Supervisor is a planeus user.
- You can assign a Supervisor to any Planning Object (except Work Steps).
- When you create a new Project, the Project’s responsible person is set as the default for all related Planning Objects.
- You can manually update this at any time.
Activating Order Items
Order Items can be activated so they’re visible in the Workbench for feedback and tracking.
- Only activated Planning Objects appear in the Workbench.
- In the Gantt charts (Timeline and Manufacturing Planning), non-activated objects show a special symbol so you can easily spot them.
- You can set the default for activation under Administration > Settings > Planning Objects.

Downloading your Projects
In planeus you can download all project data for archiving purposes.
Here’s how:
- Go to Planning Objects > Projects.
- Open the three-dot menu.
- Choose Download Project Data.
What’s included?
You’ll get a .zip file containing the following data:
- A list of Work Step feedback, including filenames of any images or documents attached (comma-separated if there are multiple).
- A list of Process feedback, also with filenames for any images or documents attached.
- All images and documents from:
- Feedback entries
- Work Steps
- Order Items